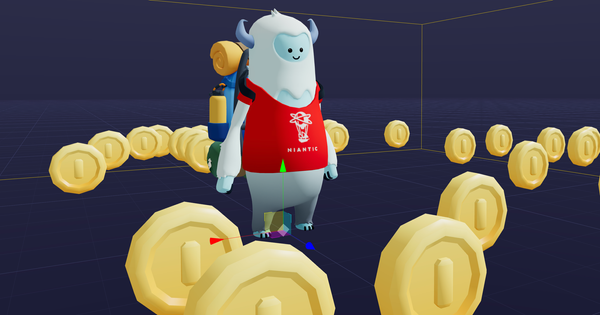
Frozen Coin Hunt Adventure
Join a new adventure with Captain Doty and go through the Frozen World. Collect golden coins and escape the Iced Mushrooms!

Make it your own with the sample project
Studio: Coin Scatter

This project guides you through how to randomly spread Coin within a given radius using Niantic Studio's component.
View sample project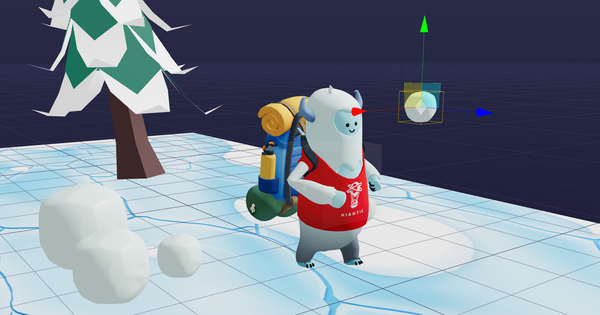
Studio: Doty Snowball Party
This project guides you through how to create a mini game using Niantic Studio Physics engine.
View sample projectBehind the Build: Frozen Coin Hunt Adventure

Written by Alex di Guida
May 16, 2025
Introduction
This experience is a WebAR game created using Niantic Studio Beta, October 2024.
The main character is the famous Captain Doty. He faces three different chapters:
The Tiny Mushroom
- Collect 20 gold coins while avoiding the tiny mushroom that’s chasing you.
The Angry Mushroom
- Collect 20 gold coins while avoiding the angry mushroom trying to catch you. The coins are all hidden, moving around with the magical snowflake floating nearby to reveal the coins.
The King Mushroom
- In this final challenge, start a snowball fight with the King Mushroom to win. Collect snowballs from the ground and throw them at the king to defeat him.
You have three hearts representing your lives. If you lose all three, the game is over.
A timer allows the player to track how long it takes to complete all three challenges, and the final score is displayed once the game is won.
There are three difficulty levels, which change the speed of the mushrooms chasing you.
Use your finger on the screen to move Doty around to collect coins or snowballs
Project Structure
3D Scene
- Base Entities: Includes the Perspective AR camera and Ambient/Directional Lights.
- UI Entities: Comprises all user interface elements displayed on the screen, providing information and feedback to the player. A tutorial is shown between each challenge.
Assets
- Includes all 3D models, audio files, and images used throughout the game.
Scripts
The scripts folder is divided into three nested folders:
• Components:
Contains the main game logic. This includes the UI screens, player movement, coin spawning logic on the frozen floor, mushroom behaviours and follow logic, and the game manager, which handles events during the game session.
• Helper:
Includes various utility functions used across the components, helping simplify and organise the game logic.
• Classes:
Contains the shader material used to manage the particle system, which renders snow falling on the playground.
Implementation
A detailed focus on the main scripts of the game, which manage all the core logic of this experience.
Each component may have different key listeners for different purposes:
• game-start: Triggered when the game starts or resumes after being paused.
• reset: Handles the component’s reset state when transitioning to the next challenge.
• pause: Stops animations and checks, such as proximity between the mushroom and the player or between a coin and the player.
• hide: Used for UI elements, hiding the interface when the game is paused or when the UI is not needed.
The listeners are dispatched from the game-manager.ts component
Coin
coin.ts
This is the coin component handling the creation of a new coin within the scene
   ecs.GltfModel.set(world, eid, {url: coinAsset})


   world.events.addListener(eid, ecs.events.GLTF_MODEL_LOADED, (result) => {
     // @ts-ignore
     const {data: {model}} = result


     storeCoinMaterial(model, eid)
     applyRandomPositionToCoin(world, eid)
   })
- Set the coin model using the coinAsset, which contains the URL of the coin model.
- Once the model is loaded, store the coin material for later use to manage its opacity.
- Assign a random position to the coin within a given radius upon creation.
spread-coins.ts
The spreadCoins function is the function called on add which is in charge of creating the coins in the scene:
const spreadCoins = (world, component) => {
 const {eid, schema: {totalCoins}} = component


 for (let i = 0; i < totalCoins; i++) {
   const coinEntity = world.createEntity()
   // @ts-ignore
   const floatingSpeed = THREE.MathUtils.randFloat(0.0005, 0.0015)
   // @ts-ignore
   const floatingAmplitude = THREE.MathUtils.randFloat(0.5, 2)
   Coin.set(world, coinEntity, {floatingSpeed, floatingAmplitude})
   world.setParent(coinEntity, eid)  // Set coin created as a children of Coins group
   coins.push(coinEntity)
 }
}
Then we have the checkSnowflakeProximity and checkPlayerProximity which are called in the tick function every frame in the component:
The checkPlayerProximity function is responsible for calculating the distance between the player and a coin. As the player gets closer to the coin, the coin get collected and hidden from the scene, waitting a reset before starting the next challenge
The collecting boolean avoids repeatedly calling the function while the coin is being collected.
const checkPlayerProximity = (world, component) => {
 coins.forEach((coin) => {
   ......
   const distanceToPlayer = vecCoinPosition.distanceTo(vecPlayerPosition)
   if (!collecting && distanceToPlayer <= collectionDistance) {
     collecting = true
     world.events.dispatch(eid, 'coin-collect')  // Updated UI score
     coins = coins.filter(c => c !== coin)  // Clear collected coin from the coins array
     disableCoin(world, coin)
     collecting = false
   }
 })
}
The checkSnowflakeProximity is a similar function. As the player gets closer to the coin, the opacity of the coin’s material gradually increases. If the player gets close enough from a coin, the coin gets collected and finally removed from the scene, as it will not be needed in the final phase.
Player
player-controller.ts
This is the player component:
const handleGameStart = () => {
     HoldDrag.set(world, eid, {factor: 12, lag: 0.25, distanceThreshold: 0.05, cone, help, timer})
   }


   const handleReset = () => {
     HoldDrag.remove(world, eid)


     const position = ecs.Position.cursor(world, eid)
     position.x = 0
     position.y = 0
     position.z = 0


     const quaternion = ecs.Quaternion.cursor(world, eid)
     quaternion.x = 0
     quaternion.y = 0
     quaternion.z = 0
     quaternion.w = 0
   }


   world.events.addListener(eid, 'reset', handleReset)
   world.events.addListener(eid, 'game-start', handleGameStart)
The HoldDrag component is set on start allowing to move Doty around
The handleReset function moves back Doty to his initial position and rotation when moving to the next challenge
hold-drag.ts
Handles the hold and drag finger gesture, moving Doty around through 3 main listeners:
world.events.addListener(eid, ecs.input.SCREEN_TOUCH_START, handleStart)
world.events.addListener(eid, ecs.input.SCREEN_TOUCH_MOVE, handleMove)
world.events.addListener(eid, ecs.input.SCREEN_TOUCH_END, handleEnd)
This component also includes the “Walk” and “Idle” animations for Doty, which are triggered when Doty is moving or standing still, respectively.
Projectile
projectile.ts
This is the projectile component handling the creation of a new coin within the scene. It represents a snowball thrown to the king mushroom.
A projectile once loaded is initialised with a scale and a timeStart, which allow to handle its life cycle in the tick function later
// Wait for the Projectile's model to be fully loaded
world.events.addListener(eid, ecs.events.GLTF_MODEL_LOADED, initializeProjectile)
A collision listener is in charge of checking if the King Mushroom gets hit with a snowball and in that case its scale is lowered if its scale reach a certain trigger, the game is win, the player has defeated the king mushroom
   // Collision event listener
   world.events.addListener(eid, ecs.physics.COLLISION_START_EVENT, (event) => {
     const {data: {other}} = event
     // Check if there is a collision with the target "Tree"
     if (target && target.toString() === other.toString()) {
       const {x, y, z} = ecs.Scale.get(world, target)
       const toX = x - 0.2
       const toY = y - 0.2
       const toZ = z - 0.2
       ecs.ScaleAnimation.set(
         world,
         target, {
           fromX: x, fromY: y, fromZ: z, toX, toY, toZ, duration: 100, loop: false,
         }
       )
       if (toX <= 1) { console.log('GAME WIN!')
         ecs.GltfModel.set(world, target, {
           animationClip: 'Death',
           loop: false,
           paused: false,
         })
         world.events.dispatch(eid, 'game-win')
       }
     }
   })
projectile-spawner.ts
The projectile spawner is an entity within Doty, a box around its body level from where the snowball “projectile” are spawned and thrown to the king.
When the snowball button in the UI is pressed, an event called “spawn-projectile” is dispatched. This event triggers the projectile spawner component, which then creates a new projectile in the scene.
     world.events.addListener(eid, 'spawn-projectile', () => {
     spawnProjectile()
   })
The spawnProjectile function creates and launches a new projectile entity in the scene. It sets the projectile’s initial position and orientation based on the spawner’s world position and rotation. The function computes the projectile’s trajectory, including its forward direction and a vertical component for a parabolic motion. It also configures the projectile’s physics properties such as mass, radius, and bounciness, before setting its speed and direction to launch it.
Snowballs
snowball.ts
This is the snowball component handling the creation of a new snowball on the frozen floor within the scene
Once loaded a snowball gets a scale and a random position set within a given radius
world.events.addListener(eid, ecs.events.GLTF_MODEL_LOADED, () => {
     applyRandomPosition(world, eid)
     const snowballScale = ecs.Scale.cursor(world, eid)
     snowballScale.x = scale
     snowballScale.y = scale
     snowballScale.z = scale
   })
spread-snowballs.ts
This component is similar to the spread-coins.ts component with 2 main functions:
- The checkPlayerProximity function calculates the distance between the player and a snowball, determining whether the snowball can be collected.
- A spread snowball function which create each snowball around the frozen floor
UI - Screens
Each UI component inside this folder represents a screen or just an UI element such as icons or a single button displayed throughout the game session. They all have a setupCss function that adds their specific CSS within the <style> tag of the <head>.
game-over-screen.ts
It shows the game over logo
It pauses all the audio from the game
Finally it plays the game over audio
landing-screen.ts
This is the screen showing at first when running the game
It is where the user can select the difficulty level he wishes to experiment. A drop down element is created with a listener which will change the difficulty level on selecting one option:
// DIFFICULTY DROPDOWN
......
const dropdown = document.createElement('select')
......
const options = ['[ Game Difficulty ]', 'easy', 'normal', 'hard']
options.forEach((option) => {
  const optionElement = document.createElement('option')
  optionElement.value = option
  optionElement.textContent = option
  ......
  dropdown.appendChild(optionElement)
})


// Add an event listener to get the selected value when it changes
dropdown.addEventListener('change', (event) => {
 // @ts-ignore
 const {target: {value}} = event
 // Update mode
 updateMode(value)
 // Handle option title selection assigned normal as default selection in that case
 if (value === options[0]) defaultSelectedValue.selected = true
})
Finally this screen is also in charge on tapping on “START” button to trigger the first game tutorial:
// ENTER BUTTON
const button = document.createElement('button')
button.id = 'enter-btn'
button.innerText = 'ENTER'
button.addEventListener('click', () => {
  ......
  world.events.dispatch(tutorial, 'show-game-tutorial', {speed, mode})
})
tutorial-screen.ts
- This screen is used when the game is launching for the first time and in between each chapters to show the new instructions and gameplay mechanics
- On pressing “OK” button, it dispatches events to start the different components in charge of running the game session:
// Handle on press start game
   button.addEventListener('click', () => {
     const dataAttr = dataAttribute.cursor(eid)
     world.events.dispatch(hearts, 'game-start', {})
     world.events.dispatch(timer, 'game-start', {mode: dataAttr.mode})
 ......
There is the creation of the UI elements such as the slider and 2 navigation arrow buttons.
win-screen.ts
- It shows the game win logo
- It pauses all the audio from the game
- Finally it plays the game win audio
UI - Elements
The remaining elements are mainly single buttons or icons displayed during a game session. They all have 2 different events allowing to hide or show their content to the user:
 world.events.addListener(eid, 'hide', () => handleHide(world, eid)) // hide
  world.events.addListener(eid, 'game-start', () => handleShow(world, eid)) // show
hearts.ts
Creates the 3 hearts icons UI in the bottom left corner of the screen representing the doty’s 3 lifes
help.ts
It is a button showing the “?” icon that the user can press during a game session to display the tutorial if needed
While the tutorial is showing the game is in pause, so the user can safely read again the instructions
score.ts
This component is specifically designed for the score UI and helps to hide or show the score
snowball-button.ts
This is a button allowing the user to trigger an event to throw a snowball during the final game part:
world.events.dispatch(spawner, 'spawn-projectile')
timer.ts
This component is in charge of creating the timer UI running during an active game session
This timer can be paused and resumed
Others
The remaining components here are the game-manager, mushroom, snow-particles, and the snowflake.
game-manager.ts
The game manager is the central component of the code that connects events during the game session, ensuring the game logic runs smoothly and allowing the player to progress through the different game chapters.
   /**
    * STATES
    */
   ecs.defineState('default').initial().onEnter(() => {
     // When entering the 'default' state, add listeners for the required events
     world.events.addListener(world.events.globalId,
       'coin-collect', coinCollect)
     world.events.addListener(world.events.globalId,
       'heart-lost', heartLost)
     world.events.addListener(world.events.globalId,
       'game-win', gameWinState)
     world.events.addListener(world.events.globalId,
       'game-over', gameOverState)
     world.events.addListener(world.events.globalId,
       'game-pause', gamePauseState)
   }).onExit(() => {
     // When exiting the 'default' state, remove the listeners
     world.events.removeListener(world.events.globalId,
       'coin-collect', coinCollect)
     world.events.removeListener(world.events.globalId,
       'heart-lost', heartLost)
     world.events.removeListener(world.events.globalId,
       'game-win', gameWinState)
     world.events.removeListener(world.events.globalId,
       'game-over', gameOverState)
     world.events.removeListener(world.events.globalId,
       'game-pause', gamePauseState)
   })
mushroom.ts
The mushroom component is the enemy entity of the game. As mentioned before there are 3 different types of mushroom: the tiny, the angry and the king mushroom
The main pieces of logic in this component are:
- growMushroom function: which is in charge of scaling up the mushroom when the player moves from its origin spot and the game is starting
- followPlayer function: in charge of setting the next position and rotation for the mushroom in order to follow the player’s movements
export const followPlayer = (world, component, ecsMushroomPosition) => {
 const {eid, data: {speed}} = component
 // Smoothly move mushroom towards player using lerp
 const lerpFactor = speed
 ecsMushroomPosition.x = lerp(ecsMushroomPosition.x, vecPlayerPosition.x, lerpFactor)
 ecsMushroomPosition.y = lerp(ecsMushroomPosition.y, vecPlayerPosition.y, lerpFactor)
 ecsMushroomPosition.z = lerp(ecsMushroomPosition.z, vecPlayerPosition.z, lerpFactor)
 // Update mushroom's position
 vecMushroomPosition = vec3.xyz(ecsMushroomPosition.x, ecsMushroomPosition.y, ecsMushroomPosition.z)
 // Make the mushroom face the player, but only rotate on the Y axis
 const direction = vecPlayerPosition.minus(vecMushroomPosition)  // Define the direction from mushroom to player
 // Calculate the angle based on the X and Z axes of the player position
 const angle = Math.atan2(direction.x, direction.z)
 // Set the Y rotation of the mushroom to face the player
 const rotationQuat = quat.yRadians(angle)
 // Directly set the new quaternion in ECS
 const currentQuaternion = getQuaternion(world, eid)
 currentQuaternion.x = rotationQuat.x
 currentQuaternion.y = rotationQuat.y
 currentQuaternion.z = rotationQuat.z
 currentQuaternion.w = rotationQuat.w
}
checkPlayerProximity: check every frame is the mushroom is close enough from the player, in that case a heart is removed and dispatch the heart-lost event
const dispatchLosingHeart = (world, mushroomId, trigger = 500) => {
 if (hearts.length <= 0) return
 const currentTime = Date.now()  // Get the current time in milliseconds
 if (currentTime - lastExecutionTime >= trigger) {  // Check if 500 second has passed
   lastExecutionTime = currentTime  // Update the last execution time
   world.events.dispatch(mushroomId, 'heart-lost', {mushroomId})
 }
}


export const checkPlayerProximity = (world, component, distanceToPlayer) => {
 const {eid, schema: {distanceCatch}} = component
 // Check if the distance is less than distanceCatch
 if (distanceToPlayer <= distanceCatch) {
   dispatchLosingHeart(world, eid)
 }
}
The dispatchLosingHeart function has a throttling logic, this ensures the function doesn't execute more often than the trigger interval. To avoid to lose all the 3 hearts in 1 frame for example
snow-particles.ts
Is the component in charge of create the snow particles falling down on each stage
It used the SnowParticles material which can be found under scripts/classes/SnowParticles
snowflake.ts
Is the 3D entity floating around Doty in the chapter 2
This component is in charge showing or hiding the component, as it is not needed during the full game session
There is a
Helpers
These helpers are a set of file providing a breakdown of logic called in different place of the code here the main one I want to go through:
data.ts
In this file you will find a lot of configuration and settings used throughout the code such as the speed values, the mushroom data (clip to play, their size, urls). All the tutorials data such as the titles, text instructions.
store.ts
This file is where you will find the storeTimer and getAllTimers functions. They are in charge of storing the time value and the difficulty mode the player used when reaching the end of the game